Wednesday 18 March 2015

Working in a Studio :Photography Masks

I worked in a classroom studio with a black paper backdrop, one light at a corner angle so it would cast a half shadow over the models face. The camera settings where f 16.0, 1/60, ISO 200. Make sure you are in sharp focus for more of an intense/cleaner image.
The models I used where my class colleagues, they were very brave to have their photos be used in my assessment and they did well and showed off the masks nicely. I needed to take a hundred or so number of photos for plenty of references & choose nine to be my final pieces.

As it was a classroom studio the other class colleagues where also present so I was nervous but I managed to get good photos that i'm pleased with. 

Health and Safety
  • Be aware of plug leads over the floor, don't be in a rush!
  • Give time for the lights to cool before handling them!!
  • Ask first if anyone present has epilepsy!!!
  • Don't blind the model!
  • Have camera strap around neck so less casualties of dropping the camera!!!
  • Floor is clear from bags!!
  • Check to see if gear is in good condition and will work properly!!


Mask research

I looked up photography masks to see what different masks there was, masquerade to gas masks, eye direction and head placement.
Many where beautiful and joyful, there where those of horror and fearfulness, all had their uniqueness to them.

Some photos had bright lighting that made the masks glow nicely depending on its colour, but the flaw was that it washed out the model making her seem doll like that I don't want in my photos so maybe have a half shadow lighting would be best for the photos so it can complement both the mask and model.

The other strong point that caught my eye was that the models gaze was else where than directly at the camera, which is fine sometimes though the different gaze directions just seemed to bring more of an emotional flow through the image from friendly to serious thought.

Tilting the head of the model managed to showed off the mask a bit more professionally and strengthen the models features more. This highlighted the more mystery, stylish theme of the themes that I want to have shown in my photos.


Friday 6 March 2015

Mike Leavitt: Iconic Shoes

Seattle-based artist Mike Leavitt created a series of cardboard shoes for the ‘Don’t Stop Object Shopping’ exhibition at NYC’s Fuse Gallery last April. The sculptures show what shoes like Air Jordan IVs, adidas Gazelles and Converse Chuck Taylor All Stars would look like in recyclable form.


Mike Leavitt's "Don't Stop Object Shopping" cardboard shoe series inspired me to make my own 3D cardboard shoes with my own twist to it though. Mike's series are realistic in both size and detail where as mine is more of an abstract version of trainers with my own design theme.
Mike's art is well created and very inspirational for those that like cardboard sculptures and well shoes basically... 
I like Mike's work as it gave me the inspiration to think out side the box and to push my limits with 3D creations as well as doing an unusual technique of sewing cardboard together. Plus improving on other techniques like lino and mono printing, also onto fabric which was new to me.

Thursday 5 March 2015

Iconic Shoes

The Guardian asked us to create a shoe themed art piece with unlimited materials and techniques. My art piece is four 3D cardboard based medium sized trainers. 


I first had to think about structure, which was puzzling at the beginning but I slowly saw it coming together with a slight abstract affect to it. I had to cut the shapes careful to kept in size and when cutting cardboard it isn't easy so that did take a little more time then thought but was manageable. After making the structure of the first trainer it was easier to do the other three, what I used to put pieces together was needle and thread. Thats right I stitched cardboard together which sounds like a silly idea but it did get the job done and kept them solid so that part was a major success in production. I then researched which animal prints I thought would suit a trainer and I found four that I liked, Leopard, Tiger, Peacock and Snake/Dragon.
My idea for the trainer cover was jean material that I thought would be great not only in style and texture but in youth culture wise as the standard combo for trainers is jeans. To print the animals pattens onto the jean material I did experiments with lino printing and mono printing (free style drawing on ink). Two long hours of printing and I had my animal patterns, some where very successful in both like the tiger, others successful with only one print method like the snake and peacock for lino and the leopard failed on both print methods so I will hand paint the pattern on the jean fabric instead. I also painted on the heel, tongue and collar the pattern or a surreal version of the animals print. I searched for an artist for ideas and came across Mike Leavitt's work and was inspired by his cardboard shoe series that I decided to use his work as a model for my own. I found it very inspirational and the realistic details he achieves perfectly are aspirational.   
On the computer I printed out images of their animal heads in a sketch form to be logos on the sides of the shoe. I also stictch a slight shape on the fabric pieces to look like the stitching on an actual shoe, as well as using the left over hem to create a midsole for my shoes to give it an authentic outlook. I want to go all the way and use actual shoe laces but the size of the art pieces and the size of my shoes didn't match well so string it was for the laces but they still look what I had imagined so I can let that pass in production wise. Finally using double sided tape I stuck on my fabric sides and finished my four trainers, the results were successful, they look like shoes and have the qualities of a shoe.
The colours came out well, I'm glad I stuck to a natural colour scheme and kept pushing forward. I'm pleased with my art work, I sought to challenge myself and think out side my comfort zone and I believe I have achieved well in creating these pieces.
I feel my work meets the needs of the brief because the subject matter is an iconic trainer- converse which forms part of a lot of sub-cultures. In terms of presentation, I would need to photograph the work so it could be in electronic format for the editors to use. If my work was selected for the exhibition I would have the pieces suspended so that they could spin slightly and people can see both sides on the pieces.

  • Health & Safety 
  • Use careful caution when handling the scalpel or the scissors!!!! 
  • Keep cardboard & cutting tools away from face area!!!
  • Keep workspace clean & tidy.
  • Be careful when handling the needle!
  • Be patient.
  • Keep paints away from face area!


Fashion Sandals: Magazine Cover & Poster

The Guardian asked us to do two final pieces for fashion, I decided to do a magazine cover and a poster that I did on illustrator as I see that has a more professional look for those choices then hand drawn.


My choice of product was hippie sandals so I chose a picture that I thought fit the theme well. I made it the background because I thought is was more stylish and highlighted the product more to the viewer. Colour choices for the title and headlines were so that they would stand out against the image but also harmonise with the colour scheme, pastel warm colours mostly minimal to yellows and oranges that gave it a bit of a tropical feel. The placement was pre-decided as I always saw it designed like that, more for my preference than style choice. The logo and barcode, like the main image I got from the interent, saving them than imperting them onto illustator. I thought those elements would definitely give it an authentic perspective which I was pleased to see that it did.
The title was positioned in a diagonal direction that I thought gave it a nice hippie style combined with the mini gerbara flower symbols I dotted around to bring a relaxed friendly vibe to the cover. The cover turned out better than I imagined and I'm very pleased in my work, as I didn't think I'd be able to use illustator that well. Thanks to the little details like the logo, barcode and flower symbols I've managed to produce in my opinion a clear professional looking digital piece.


For my fashion poster I used photoshop and what a war that was as I had to use the Guardian's computer as the laptop wasn't liking photoshop, luckily I managed to finish it and am very pleased with the results. As it is a fashion promotion I decided a runway for the background would be stylish and bring an affective contrast with the hippie theme. With guidance from the Guardian, I cropped the hippie sandals that also included legs and feet onto the background, so it looks like the legs/sandals have just walked down the runway and are posing. The background image is a bit hazing as I wanted the focus mostly on the sandals, their image is clear and focal. Using the eye-drop icon I could use the colours from the sandals for the title and information to keep to the friendly, relaxing colour scheme.
The font used was brush script as I thought it would combine both fashionable and free flowing styles that would attracted both the chic and the spirited. The titles position is going across the image, like the magazine cover, as that's my trade mark for fashion themed assessments and I like the look it gives it, un-straight, not squared as the saying goes. The placement for the other slogans was more of a classic positioning and easy to spot places. I've included date, time, location and an occasion that I believe give a professional look and bring it to a success it fashion promotion. I am thrilled I have managed to create these wonderful graphic pieces with my luck at computer skills but I am very pleased with the results they gave given me.  

Monday 2 March 2015

Punk Pattern: Beginning to Finished Piece

The Guardian asked us to create a punk pattern for a jewelry box. 


Clay tiles: punk objects pressed into clay and that leaves an impression of the object behind.
Create patterns with the punk object in the clay then have them sent off to be biscuit fired.
I did 6 tiles and i'll admit that I only like half of them, second from the bottom then fourth than 5th.
The zips and studs looked great, nice detail and the groves are visible but the safety pins didn't give results the way I wanted without deforming the clay around it.

After being biscuit fired then glazed and then re-fired this is the results. The colours I choose to glazed with were red and purple, colours that I thought would look punk and they did. The purple has a tinge of grey to it that gives off a brooding emotion where as the red gives an explosion of chaos.
These emotional vibes of the colours combined with the object imprints enhance their punk theme making them great for example pieces for the project on colour and placement choices. The zippers fired perfectly with defined detail and the rough looking tiles now finished do look great as punk doesn't care for neatness.
Health & Safety

  • Keep clay & tools away from face area!!!
  • Clean tools after use.
  • Use care when handling the tools!!
  • Keep glaze power away from face area!!!
  • Keep work space clean & tidy.
  • Apron & gloves optional.


After consulting with myself I decided to try the lino route. So after choosing some repeating objects like the safety pins, as I thought they'd be better productive on lino piece (which they were),  I also choose some new ones like keys and skulls for a wider punk range.  After deciding what to carve I paused to think about what the placement would look like, mostly I thought of them on the spot but with the skull I did some thumb nail sketches in my sketchbook to help me think. The union jack has a placement of its own so no changes there, the safety pins I kept the same design as the clay tile one and the keys were a free flow kind of design that did end up looking ok.

The safety pins and skull carved out nicely shaped and even gave positive prints on a good range of textured materials, the union also print very well no real troubles there as it is a simple design. The keys were a bit tricky to print fully as there was either too much ink or not enough as it is a compacted design but I did get some good ones. Again I use red and purple for colour choice as they gave great results on the clay tiles before and on lino print they gave great results for that too that I was happy with. Although when I did tiles with the linos I choose green and grey/blue glazes to also widen the range on punk fitting colours and they too gave great results that i'm happy with. The lino clay tiles fired well and the images are clear to see with the smooth glaze texture they finished well and i'm happy with the examples.
I next did plaster casts of my linos which is a 3D surface texture piece made by using non-fired clay tiles as a mould, build walls around them as a container for the mixer of plaster powder and water making sure there are no holes.
They dry fast and naturally. They finished wonderfully, if a bit chunky never the less they managed to produce clear 3D images of my lino pieces. You can't use glaze on plaster cast but normal paints are fine though I didn't paint mine as I thought they were better off as natural sample. Though I am pleased with them I believe they are successful examples.
Health & Safety
  • Keep lino & tools away from face area!!!
  • Carve away from hand!!
  • Keep lino shaving in a pile!
  • Keep inks away from face area!!!
  • Keep work space tidy.
  • Keep plaster powder away from face area!!!
  • Don't leave hand in plaster mix!!!!
  • Wash hands straight after!
  • Aprons & gloves optional.


Resposse: which is drawing/pressing into metal. These pieces are from drink can metal so the metal is harder then the normally used metal for respousse, but I did the best I could which wasn't bad as there is some impression and the images are visible. They might not be 100% success but near 60% at least, this has shown me that using a different method would be better as there is a shortage on the normal metal used for the technique so is was wiser to use a different approach. These are old ideas that aren't really designs more of a sort of test for the metal then for a pattern choice but they did give an alright result that I am happy with but won't be using, only another sample to come back to.
Health & Safety

  • Careful of sharp edges!
  • Keep metal away from face area!!!
  • Keep work space tidy.


This poorly crafted art piece is nail art, a technique like the name suggests uses nails to create a picture then threading through it to structure it more strongly/visually. I was trying to craft a union jack in a sort of abstract way, which although that part was achieved on some level the result I wanted wasn't however achieved. It has a child like quality to it which i didn't want but does make you smile in a odd way. The background is made up of three layers of cardboard and a book page for a visual backdrop, the third layer of cardboard I shaped into the cross then covered that in a netted fabric for more of a texture affect then for beauty wise. I choose the tradition colours to do the rest of the nails and as you can see it didn't go as I had hoped, the result was definitely not what I had imagined it to be so it was not a success. Though it doesn't really feel punk it does make a good example to look back on as I can improve on were I had lacked in direction.
Health & Safety

  • Keep nails away from face area!!
  • Be careful when handling the nails!
  • Wear a thimble if found or use masking tape.
  • Be patient.
  • Keep work space tidy.
  • Use scissors with care!


Layered cardboard is a good technique and can be a bit hard to cut with scissors or a scalpel so choose wisely and carefully. The technique is easy to follow as your pieces either get smaller or bigger depending on how you want to layer it. I choose my union jack pattern for this technique as I though it would look neater though I did rush it a bit so it's slightly jagged. A technique I wouldn't usually use but it does have a nice affect and great for sample making. I'll admit that I could of done it with a bit more patience but at least it does look like my pattern so there is success in that. I won't be using this technique but I like the idea of a cardboard background.
Health & Safety

  • Use caution  when cutting the cardboard with either scissors or scalpel!!
  • Keep cardboard & tools away from face area!!!
  • Keep work space tidy.
  • Be patient. 


 This is my final pattern, improved from my original lino cuts.
I chose which of my linos would I like to work from and that was my skull piece, so drawing three different patterns based on that first design I finally came to draw this design which I thought was an improvement. I stuck to making my final piece a lino print because the texture and unneatness just seems to shout punk. I am very pleased with the piece as it is successful in shape and manages to look clear and professional at only 8cm by 8cm, this is my final lino that will create my final punk pattern piece.
The same health & safety rules apply! 


My final punk piece.
I thought a white cardboard background would look more professional and contrast better with the dark ink colour choices. Purple and black harmonise well together and create a good punk affect, the rough texture and the skulls looking slightly deformed beautifully enhances the punk theme more. Imagery is still clear and visible also to my view has a professional finish to it. My inspiration was from Vivianne Westwood herself with her punk aura and unwavering charisma.


Typography: Progress

These pictures will show you the progress on how I started and how it slowly but steadily filled my first typography work and became a finished final piece.


The style is call random overlap, it's a slow process but the end result is amazing (as reveiled throw out the scene shots). I chose to have the text in colours and the first is my favorite colour red. The font is rosewood and I happened to come across it by the title as it sounded pretty and the affect of the font was great as it gave a vintage look to an abstract typography piece.


You keep building up the words, there is no real limit to random overlap it's more of the persons view point. The second colour I chose was green as I thought it worked well with the red.
This process was working well as there really isn't a wrong way but i'll admit there was a time or two  that had me frustrated as I kept losing where I had placed the words or which words I had done, having it in colour was a better option than black as the colour made it easier to see against the white back ground. As black would have blended together too much making it look like a black blob than a type scramble.


After quite the build up of words I test the title to see how it would wrap up and realised a third column was needed for it to be completed, so I put the title letters to one side and started the third column.
Green was another easy to see choice and it was luck that made it compatible with the red, the hard part was thinking of another colour that would suit the others but would be easy to see against the white background. After all there was shades to consider, lighter or darker, then there was the fuss about not having enough lyrics so it wouldn't look like too much of a repeat. I had to think of the best path to take as I didn't want to change the placement or style but I did find the compatible colour.


Colour choice for this column was blue which suited the other two nicely without being harsh on the contrast. I realised the columns formed a sort of flag look that just fitted the random theme because lets be honest flags were random at first too. The solution to the lyrics problem was that I found another song that had the same title as the first so the concept would be the same even if the lyrics meanings were different. It was hard at first using different lyrics has I had almost mesmerised the first set so I pasted the song onto the side so I didn't have to kept going back and forth on websites.


The process was long but manageable, three - four lessons it took to complete the first piece, (which is why the second one turn out simpler to save time). The red and green columns are of the same lyrics, i'm Alive by Becca, I had the lyrics printed on a sheet which I thought was easier but the blue column made up by Celine Dion's i'm Alive lyrics was easier to have on the screen then to print them out, (which is why they appear at the near end and not at the beginning.)
I thought a good finish would be having the title in bigger, bolder letters and going across the page in a repeat for a kind of professional/hypnotic affect which I believe to have been a success. At first though I had problems with the right size of the letters, thinking is this too big or too small but luckily I did settle on a size that did turn out quite nice. Than trying to have them in almost perfect lining which I almost gave up on as the Guardian did complain that they didn't look straight a few times but with patience it was manageable and I got them in line that gave the results I wanted and suited the rest of the piece.
I am very pleased with my choice to do the random style as it gave better results than I would have imagined.  


Friday 27 February 2015

Typography: I'm Alive Lyrics Art

The Guardian has ask us to create typography pieces of two different styles using lyrics from songs we find inspirational to us. My first typography piece is a random chaotic style that has a jumble effect that is pleasing to the eyes of some, others may find it a mess but like the technique as it's different from the normal neat style. My second piece it much more simple and has a charming effect as the lyrics have been put in shapes this time making it a complete opposite to the first, they both contrast each other in a positive way has they highlight their strengths more then their weakness.
My typography lyric art pieces.
Using the song lyrics of I'm Alive by Becca to create my pieces with a little of Celine Dion I'm Alive lyrics also in the first piece but not the second.


Illustrator was used to create my Lyric pieces, I am pleased that I managed to use illustrator with few hiccups and finish my final pieces the way I had visioned.

The first piece is a combination of I'm Alive by Becca and I'm Alive by Celine Dion lyrics, we had to pick a song, I'm Alive by Becca, that emotional inspired us and create a typography piece with those lyrics. I also choose Celine Dion's song to be the middle section and break up Becca's so it wouldn't be so much repeating. I did a 'random' pattern typography of overlapping with font style Rosewood and put different sections in different colours in a sort of flag style with title in black coming across the page repeatedly in big letters.
I believe the piece to be a success as it's what I had in mind, the colours go well with each other and the Title gives it a professional finish. Neville Brody was the inspiration for my first piece, his style of graphics can go from black and white simple to fun multi colours with a stylish jumble of words and images. I've managed do create my own style version of he's creativity without a complete take over.

My second typography piece is an opposite to the first as that is a random overlap and this is a simple word image style with only one colour to living it up and the font style Curtz MT. I thought it would be a great contrast with the lyrics of only I'm Alive by Becca in shapes of flowers, the lyrics are of dark psychology were as flowers are associated with life and spring.
I'm happy with the results, I managed to give it that certain cute charm despite what the lyrics say producing a warped abstract theme. I believe this piece is also a success.
The typographer who inspired this piece was Ms Kate Moross, her jazzy, un-beat creations had me thinking of creating one my version as the lyrics would be a fantastic contrast to the image of flowers. Though Kate Moross uses bold, multi-colour schemes I decided to do the opposite and go for a black and white theme that brought the piece together very well.


Photography: Masks 4 Photoshop

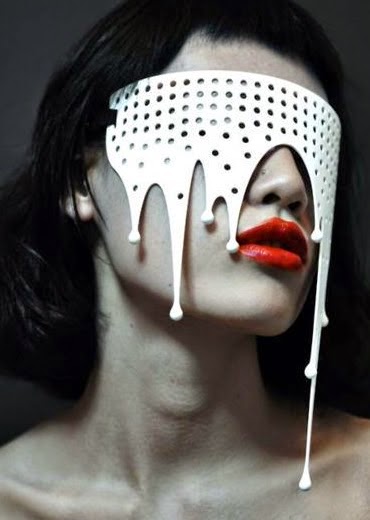
I've kept my 9 final photos real by not photoshopping them and keeping that natural look with background and all.
Although this post will be about photoshop, seeing the difference between natural and staged.
I must admit that there are some photoshop style done photos that I see as an improvement to the natural giving it more feel to the viewer.

 First off I cropped the photo to portrait that would give it a closer fit to the face, while it also got rid of the extra background showing only a pure black drop look.


 Once nicely cropped I level it slightly to make the back drop more intense black and the little white cleaner. I like the cropped look as it brings more focus on the masks and model highlighting them almost professional plus it looks tidier.
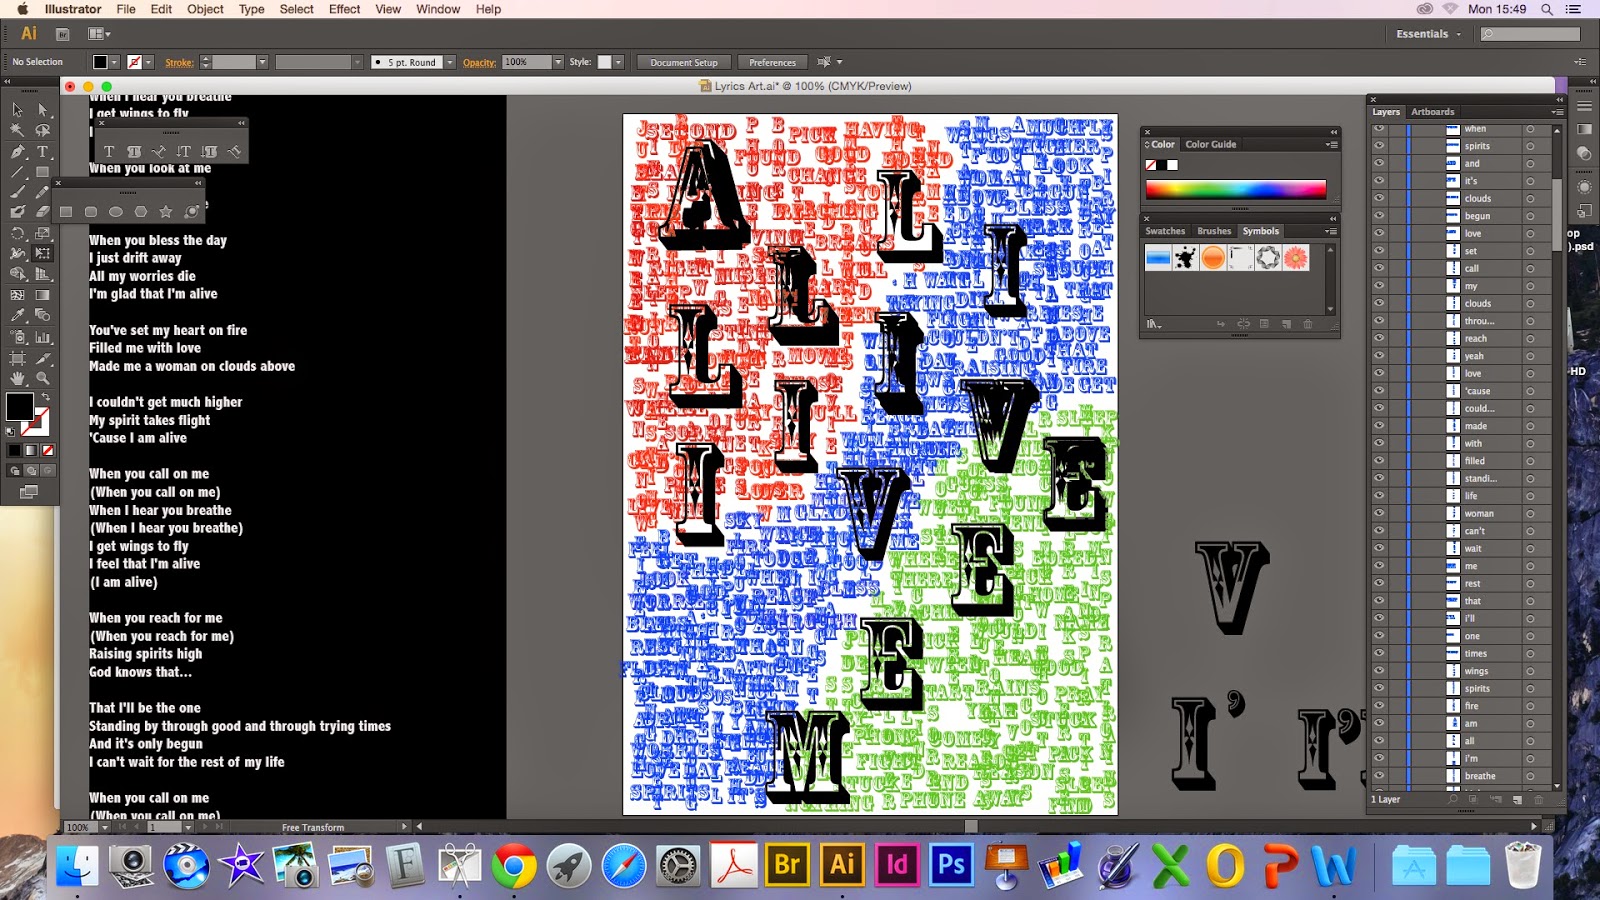
To level the picture go to layer then new adjustment layer then Levels... which will bring up the levels panel that will help you adjust the exposure levels to how you want by moving the little arrows on the wave chart (as show in picture).


 My first filter change was making the image black and white. Again layer, new adjustment layer then black and white...
I love the black and white adjustment to this photo as it brings more mystery and even a bit of sophistication to the theme.


I now move on to filters: they can bring a slight or bold tint to the image depending on what density you set it at. Layer, New Adjustment Layer then Filter....
This is a Warming Filter (LBA) with the density of 25%. The tint does seem to give her a healthier, warm glow to the skin making it more real vibe to the viewer. I like this warm filter, it bring out her youth more and just seems to intensify the masquerade theme successfully.


Cooling Filter (80) with the density of 63%.
This cooling filter gives the affect of chilling silence, the tint blends well with the white mask adding successful to the masquerade theme with a hint of ice queen beauty. I like this filter, it gives positive results and still manages to maintain its natural feel.


Red Filter with the density of 73%.
Although it not longer has the natural feel, the mars like sand shades deepen her skin tones nicely. The red filter tints well with the white mask. For some reason when I look at the image with the red filter I see a professional feel to it. Earthy tints suit the white mask and the model's complexion successfully and I would gladly do a second piece with the edited photos.


Green Filter with the density of 60%.
The green tints well with the white mask, though I can't be 100% certain if the contrast between the model's complexion and the green filter is a good comparison. Despite that, I still think it works but it would need to be in a grid style frame with 3 others of different shades of green to structure it better.


Violet Filter with the density of 60%.
Though the tints goes well with the white mask it doesn't go well with the model's complexion.
I don't think this is quite successful like the others above but it does have a certain charm about it, like it still gives of warm vibes despite purple being a cold colour. I think violet is a bit warmer to the original shade, I like this photo change and would use it.


Sepia Filter with the density of 99%.
The filter I believe is very successful with both the white mask and the model's complexion as it gives an earthy yet vintage feel to it that complements the eyes. The brownish blush tones the skin richly and gives it a professional finish in my view. I am very pleased with the results and would certainly use the image with the other earthy tints.


Underwater Filter with the density of 77%.
Tints the white mask well, slightly changing the colour to a light blue giving the mask a mystical look than a mystery vibe. Despite the high density the filter still manages to give it a hint of a natural look and contrast the model's complexion nicely. Like the green filter this would also be more successful with other images with a blueish tint, unlike the cooling filter that gave it an ice queen beauty this filter has a more sea-foam colour that makes you think sea fairy then ice queen. I do like this filter and would use it again as well as the image.